Showing posts with label WPF. Show all posts

Thursday, May 12, 2016

How to create a context menu in WPF.

It is the way creating a ContextMenu in WPF.

1. Select a window on the design UI of the your project.


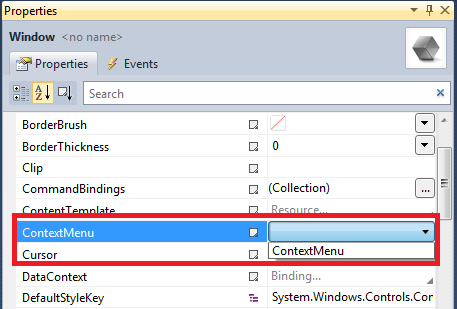
2. Select a ContextMenu item on the combo box of the window's a ContextMenu property.

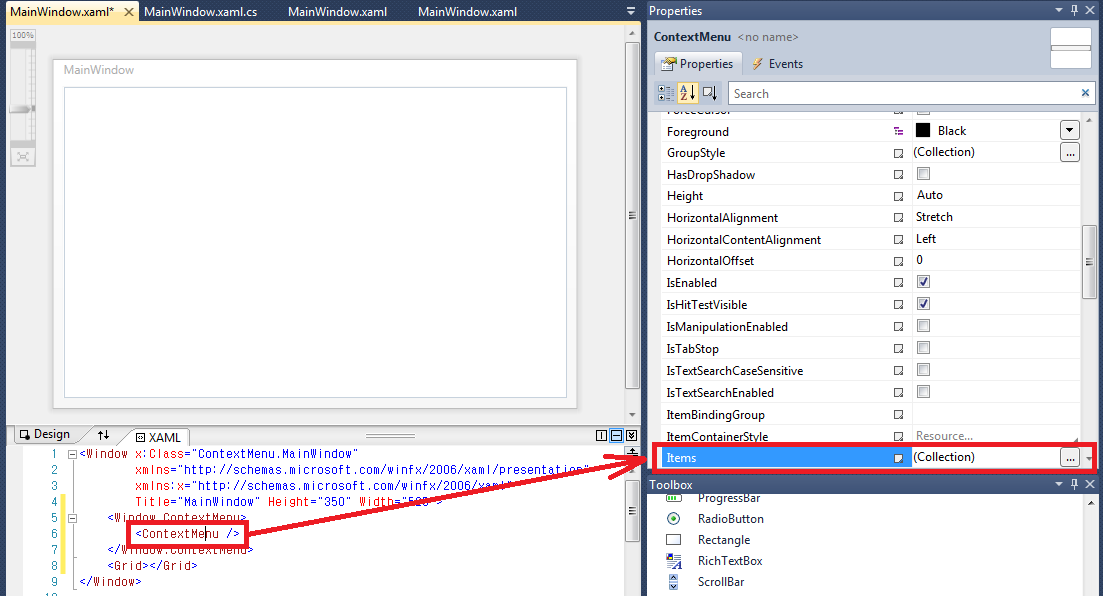
※ You can check a added Window.ContextMenu tag on the XAML, look like the below image.

3. Display the properties of the ContextMenu when selecting a ContextMenu tag.
 ※ You can select the ContextMenu object on the Document Outline.

4. Open Collection Edition Items window, when click a button of the ContextMenu's Items property.

5. MenuItem is added when click Add button.
 ※ You can check a added MenuItem tag on the XAML, look like the below image.

6. If you run your project and click a right button of a mouse, you can see the context menu on the run window.


Wednesday, May 4, 2016

Creating WPF Project on Microsoft Visual Studio

It is very easy to create WPF project on Microsoft Visual Studio.

1. Click File > New > Project menu.


2. Click Ok button after selecting WPF Application, writing Name/Location/Solution name.

3. Creating WPF Application Project.

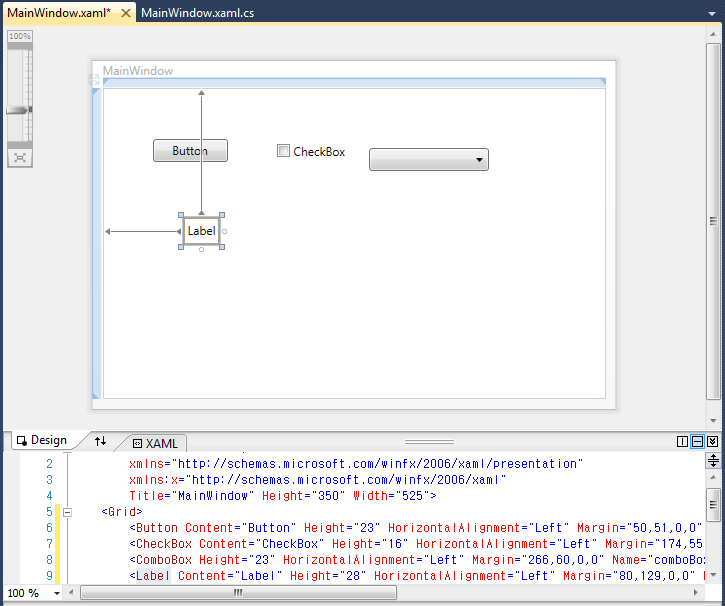
4. You can add the controls on the Window.

5. Below image is the running application.


Tuesday, April 26, 2016

WPF - How to create window without title bar.

1. Change WindowStyle property.(Remove the title bar)
(1) You can set "WindowStyle=None".

 (2) Below image is the Window without the title bar.

2. Change AllowsTransparency property.(Remove the border of the window)
(1) You can set "AllowsTransparency=true".
 (2) Below image is the Window without the border.

3. Change the border of the Window.
(1) You can set "BorderBrush=Black" and "BorderThickness=1".
   - BorderBrush is the border color.
   - BorderThickness is the thickness of the border.

 (2) Below image is the window with the border.

4. Move the window.
  If the window is disappeared the title bar, you can not move the window.
  So you have to add the event of Mouse Left Button Down.
(1) Add MouseLeftButtonDown event.
 (2) Type the below code in the MouseLeftButtonDown event.

1
2
3
4
private void Window_MouseLeftButtonDown(object sender, MouseButtonEventArgs e)
{
    this.DragMove();
}


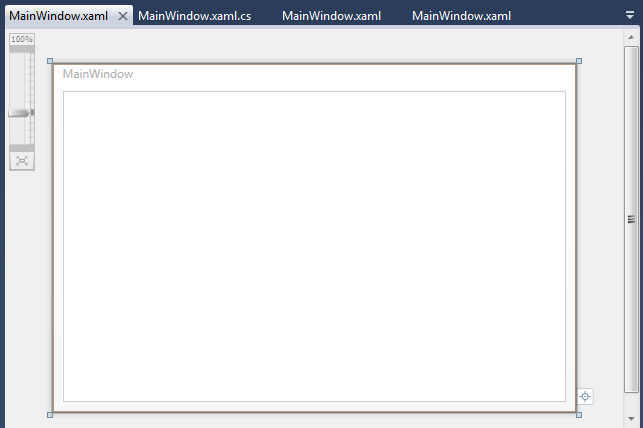
5. Resize Window.
  If the window is disappeared the title bar and the border, you can not resize the window.
  So you have to change ResizeMode property.
(1) You set "ResizeMode=CanResizeWithGrip"
(2) Display the grip the right and the bottom of the Window.
     You can resize the grip.


Monday, April 18, 2016

WPF - How to bind custom class in a DataGrid?

It is the way binding a custom class to a WPF GataGrid.

1. Add the DataGrid on the Window.

2. Add the columns in the DataGrid.

3. Bind a custom property in the columns of the DataGrid
 1
 2
 3
 4
 5
 6
 7
 8
 9
10
11
12
13
<Window x:Class="BindingCustomClassToDataGrid.MainWindow"
        xmlns="http://schemas.microsoft.com/winfx/2006/xaml/presentation"
        xmlns:x="http://schemas.microsoft.com/winfx/2006/xaml"
        Title="MainWindow" Height="350" Width="525" Loaded="Window_Loaded">
    <Grid>
        <DataGrid AutoGenerateColumns="False" Name="dataGrid1">
            <DataGrid.Columns>
                <DataGridTextColumn Header="ID" Binding="{Binding ID}"/>
                <DataGridTextColumn Header="Name" Binding="{Binding UserName}"/>
            </DataGrid.Columns>
        </DataGrid>
    </Grid>
</Window>

4. Add the Loaded Event of the Window.

5. Type below codes in the Window Loaded Event.

 1
 2
 3
 4
 5
 6
 7
 8
 9
10
11
12
13
14
15
16
17
18
19
20
21
22
23
24
25
26
27
28
29
30
31
32
33
34
35
using System;
using System.Collections.Generic;
using System.Linq;
using System.Text;
using System.Windows;
using System.Windows.Controls;
using System.Windows.Data;
using System.Windows.Documents;
using System.Windows.Input;
using System.Windows.Media;
using System.Windows.Media.Imaging;
using System.Windows.Navigation;
using System.Windows.Shapes;

namespace BindingCustomClassToDataGrid
{
    public partial class MainWindow : Window
    {
        public MainWindow()
        {
            InitializeComponent();
        }

        private void Window_Loaded(object sender, RoutedEventArgs e)
        {
            List<CustomClass> list = new List<CustomClass>();
            list.Add(new CustomClass { ID = "ID-01", UserName = "Name-01" });
            list.Add(new CustomClass { ID = "ID-02", UserName = "Name-02" });
            list.Add(new CustomClass { ID = "ID-03", UserName = "Name-03" });
            list.Add(new CustomClass { ID = "ID-04", UserName = "Name-04" });

            dataGrid1.ItemsSource = list;
        }
    }
}

6. Below image is result.

※ You can refer the below video.

Thursday, April 14, 2016

WPF - Binding DataTable to a DataGrid

It is the way binding a DataTable to a GataGrid

1. Add the DataGrid on the Window.


2. Click the columns property button[...] on the Properties of DataGrid


3. Add the three colums to the DataGrid.


4. Type the Binding attribute on the DataGridTextColumn tag.

1
2
3
4
5
6
7
<DataGrid AutoGenerateColumns="False" Height="217" HorizontalAlignment="Left" Margin="38,56,0,0" Name="dataGrid1" VerticalAlignment="Top" Width="420">
    <DataGrid.Columns>
 <DataGridTextColumn Header="ID" Binding="{Binding Path=ID}"/>
 <DataGridTextColumn Header="Name" Binding="{Binding Path=NAME}"/>
 <DataGridTextColumn Header="Telephone" Binding="{Binding Path=TEL_NO}"/>
    </DataGrid.Columns>
</DataGrid>

5. Add the Loaded event of the Window.


6. Type the below code to the Window's Loaded event.

 1
 2
 3
 4
 5
 6
 7
 8
 9
10
11
12
13
14
15
16
17
18
19
20
21
22
23
24
25
26
27
28
29
30
31
32
33
34
35
36
37
38
39
40
41
42
43
44
45
using System;
using System.Collections.Generic;
using System.Linq;
using System.Text;
using System.Windows;
using System.Windows.Controls;
using System.Windows.Data;
using System.Windows.Documents;
using System.Windows.Input;
using System.Windows.Media;
using System.Windows.Media.Imaging;
using System.Windows.Navigation;
using System.Windows.Shapes;
using System.Data;

namespace DataGridBinding
{
    public partial class MainWindow : Window
    {
        public MainWindow()
        {
            InitializeComponent();
        }

        private void Window_Loaded(object sender, RoutedEventArgs e)
        {
            // Create DataTable instance.
            DataTable dataTable = new DataTable();

            // Add the columns.
            dataTable.Columns.Add("ID", typeof(string));
            dataTable.Columns.Add("NAME", typeof(string));
            dataTable.Columns.Add("TEL_NO", typeof(string));

            // Add the datas.
            dataTable.Rows.Add(new string[] { "ID-01", "Name 01", "010-0001-0000" });
            dataTable.Rows.Add(new string[] { "ID-02", "Name 02", "010-0002-0000" });
            dataTable.Rows.Add(new string[] { "ID-03", "Name 03", "010-0003-0000" });
            dataTable.Rows.Add(new string[] { "ID-04", "Name 04", "010-0004-0000" });

            // Binding DataView of DataTable.
            dataGrid1.ItemsSource = dataTable.DefaultView;
        }
    }
}

※ Refer below binding the columns of DataTable and DataGrid


7. Below image is result.


Refer below video.

Tuesday, April 12, 2016

WPF - Binding the datas of DataTable on ComboBox.

It is the way binding the datas of DataTable on ComboBox.

1. Add ComboBox on the Window.


 2. Type ComboBox name.


3. Add Initialized Event on Window.


 4. Add SelectionChanged event of ComboBox.


5. Type below codes on Window's code file.
 1
 2
 3
 4
 5
 6
 7
 8
 9
10
11
12
13
14
15
16
17
18
19
20
21
22
23
24
25
26
27
28
29
30
31
32
33
34
35
36
37
38
39
40
41
42
43
44
45
46
47
48
49
50
51
52
53
54
55
56
57
using System;
using System.Collections.Generic;
using System.Linq;
using System.Text;
using System.Windows;
using System.Windows.Controls;
using System.Windows.Data;
using System.Windows.Documents;
using System.Windows.Input;
using System.Windows.Media;
using System.Windows.Media.Imaging;
using System.Windows.Navigation;
using System.Windows.Shapes;
using System.Data;

namespace ComboBoxBinding
{
    public partial class MainWindow : Window
    {
        public MainWindow()
        {
            InitializeComponent();
        }

        private void Window_Initialized(object sender, EventArgs e)
        {
            // Create DataTable instance.
            DataTable dataTable = new DataTable();

            // Add the colums in DataTable.
            dataTable.Columns.Add("VALUE", typeof(string));
            dataTable.Columns.Add("NAME", typeof(string));

            // Add the datas in DataTable.
            dataTable.Rows.Add(new string[] { "KR", "Korea" });
            dataTable.Rows.Add(new string[] { "US", "America" });
            dataTable.Rows.Add(new string[] { "CH", "China" });
            dataTable.Rows.Add(new string[] { "JP", "Japan" });

            // Binding DataView of DataTable on ComboBox.
            comboBox.ItemsSource = dataTable.DefaultView;
            // Set DisplayMemberPath attribute.
            comboBox.DisplayMemberPath = "NAME";
            // Set SelectedValuePath attribute.
            comboBox.SelectedValuePath = "VALUE";
        }

        private void comboBox_SelectionChanged(object sender, SelectionChangedEventArgs e)
        {
            // Check the slected data.
            foreach (DataRowView row in e.AddedItems)
            {
                MessageBox.Show("Value : " + row["VALUE"] + "\n" + "Name : " + row["NAME"]);
            }
        }
    }
}


6. Below images is result.


Refer below vedio.

Thursday, April 7, 2016

WPF - Add User Control Tabs in Tab Control.

We can add a Tab Item of TabControl dynamically.
This post is simple example that User Control Tabs is added in TabControl.

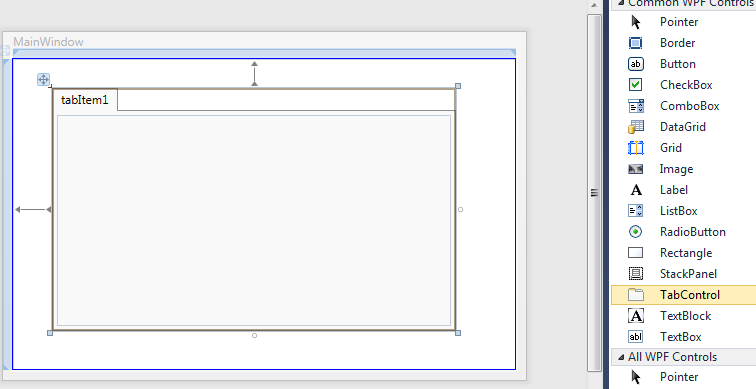
1. Add TabControl in Window.

2. Show a dialog of TabControl Items.

3. Remove a TabItem.

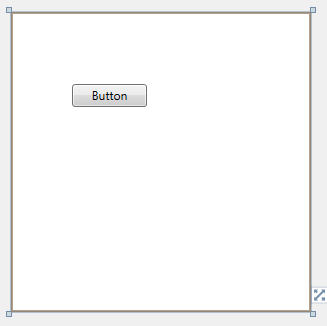
4. Create User Control.(I created 3 User Control)


5. Add Window Loaded event.

6. Type below code in Window Loaded event.

 1
 2
 3
 4
 5
 6
 7
 8
 9
10
11
12
13
14
15
16
17
18
19
20
21
22
23
24
25
26
27
28
29
30
31
32
33
34
35
36
37
using System;
using System.Collections.Generic;
using System.Linq;
using System.Text;
using System.Windows;
using System.Windows.Controls;
using System.Windows.Data;
using System.Windows.Documents;
using System.Windows.Input;
using System.Windows.Media;
using System.Windows.Media.Imaging;
using System.Windows.Navigation;
using System.Windows.Shapes;

namespace AddTabItem
{
    public partial class MainWindow : Window
    {
        public MainWindow()
        {
            InitializeComponent();
        }

        private void Window_Loaded(object sender, RoutedEventArgs e)
        {
            UserControl[] userControls = new UserControl[] { new UserControl1(), new UserControl2(), new UserControl3()};
            foreach (UserControl uc in userControls)
            {
                TabItem tabItem = new TabItem();
                tabItem.Header = "New Tab";
                tabItem.Content = uc;

                tabControl1.Items.Add(tabItem);
            }
        }
    }
}

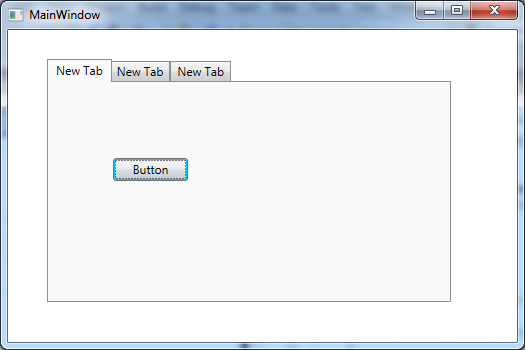
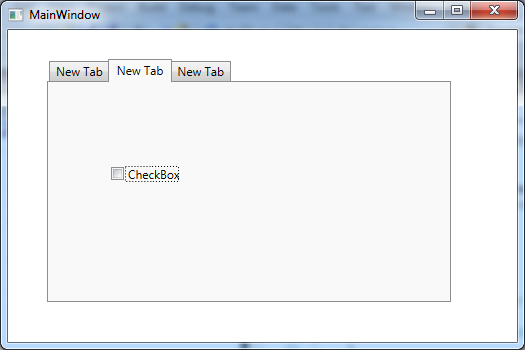
7. If you run WPF Appliction, you can see added 3 TabItem in TabControl.


WPF - Add an Image in a button

We can add an image in a WPF button easily.


Refer below XAML code.
 1
 2
 3
 4
 5
 6
 7
 8
 9
10
11
12
13
14
15
<Window x:Class="ImageButton.MainWindow"
        xmlns="http://schemas.microsoft.com/winfx/2006/xaml/presentation"
        xmlns:x="http://schemas.microsoft.com/winfx/2006/xaml"
        Title="MainWindow" Height="350" Width="525">
    <Grid>
        <Button HorizontalAlignment="Left" Margin="50,50,0,0" Name="button1" VerticalAlignment="Top">
            <ContentControl>
                <StackPanel Orientation="Horizontal" Width="Auto" HorizontalAlignment="Left">
                    <Image Source="/ImageButton;component/images/save.gif" Margin="0,0,5,0" Width="20" Height="20" />
                    <TextBlock Text="Image Button" VerticalAlignment="Center" Height="18" Width="Auto" />
                </StackPanel>
            </ContentControl>
        </Button>
    </Grid>
</Window>