It is the way creating a custom listview in android.
1. Create Android Project
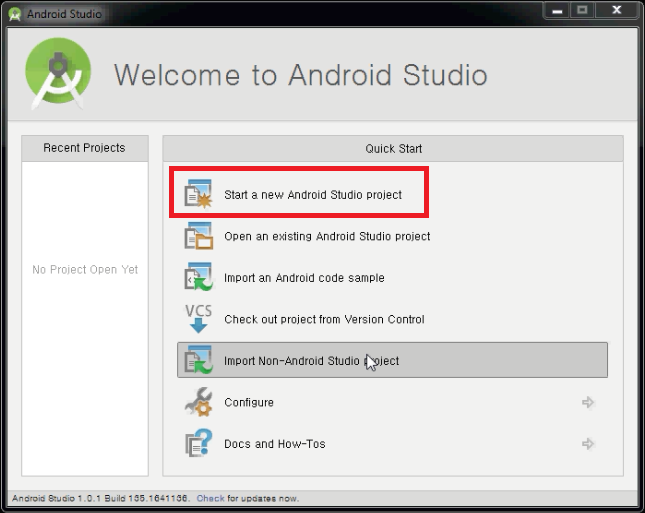
(1) Click the Start a new Android Studio project.
(2) Click the next button after type Application name and Company Domain.
(Create package name by company domain and application name.)

(3) Click the next button after check Pone and Tablet Check Box.

(4) Click the next button after select Blank Activity.

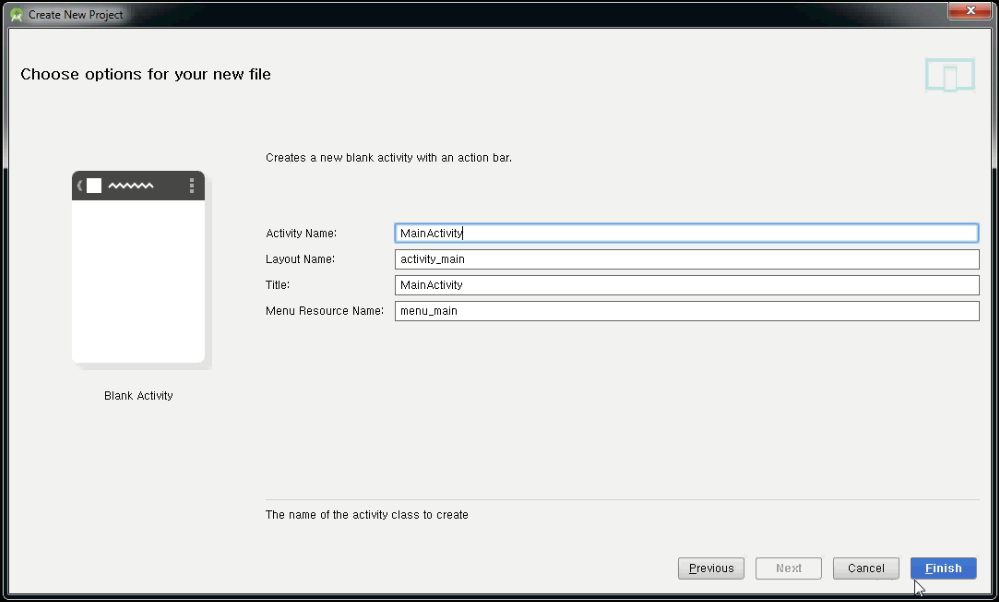
(5) Click the finish button after type Activity Name, Layout Name, Title, and Menu Resource Name.
(If the finish button is clicked, Android Project is created)
2. Add a ListView in the activity layout, look like below image.

- Activity Layout Source
1 2 3 4 5 6 7 8 9 10 11 12 | <RelativeLayout xmlns:android="http://schemas.android.com/apk/res/android" xmlns:tools="http://schemas.android.com/tools" android:layout_width="match_parent" android:layout_height="match_parent" android:paddingLeft="@dimen/activity_horizontal_margin" android:paddingRight="@dimen/activity_horizontal_margin" android:paddingTop="@dimen/activity_vertical_margin" android:paddingBottom="@dimen/activity_vertical_margin" tools:context=".MainActivity"> <ListView android:id="@+id/listview" android:layout_width="match_parent" android:layout_height="match_parent"/> </RelativeLayout> |
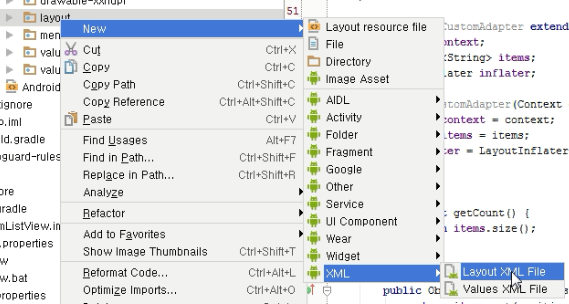
(1) Click the menu of Layout XML File, look like below image.
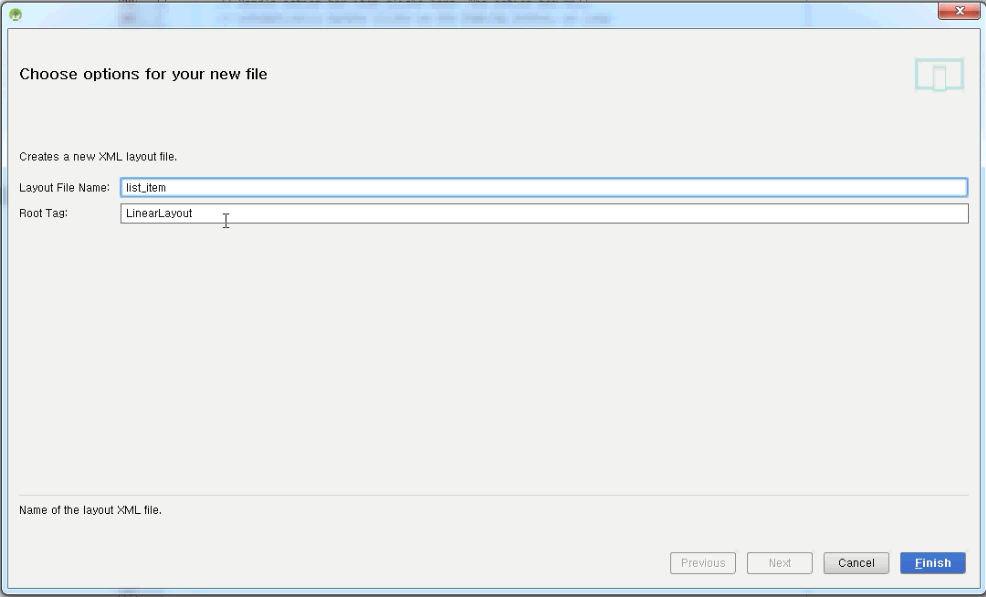
(2) Click the finish button after type Layout File Name and Root Tag.
(3) Add a ImageView and a TextView in the list item layout, look like below image.

1 2 3 4 5 6 7 8 9 10 11 12 13 14 15 16 17 18 19 20 | <?xml version="1.0" encoding="utf-8"?> <LinearLayout xmlns:android="http://schemas.android.com/apk/res/android" android:layout_width="match_parent" android:layout_height="match_parent" android:orientation="horizontal"> <ImageView android:layout_width="100dp" android:layout_height="50dp" android:layout_gravity="center_vertical" android:src="@drawable/south_korea" android:id="@+id/imageView" /> <TextView android:layout_width="match_parent" android:layout_height="wrap_content" android:layout_margin="5dp" android:layout_gravity="center_vertical" android:text="Korea" android:id="@+id/textView" /> </LinearLayout> |
4. Type the code in the activity, look like below image
1 2 3 4 5 6 7 8 9 10 11 12 13 14 15 16 17 18 19 20 21 22 23 24 25 26 27 28 29 30 31 32 33 34 35 36 37 38 39 40 41 42 43 44 45 46 47 48 49 50 51 52 53 54 55 56 57 58 59 60 61 62 63 64 65 66 67 68 69 70 71 72 73 74 75 76 77 78 79 80 81 82 83 84 85 86 87 88 89 90 91 92 93 94 95 96 97 98 99 100 101 102 | package com.jmsys.customlistview; import android.content.Context; import android.support.v7.app.ActionBarActivity; import android.os.Bundle; import android.view.LayoutInflater; import android.view.View; import android.view.ViewGroup; import android.widget.AdapterView; import android.widget.BaseAdapter; import android.widget.ImageView; import android.widget.ListView; import android.widget.TextView; import android.widget.Toast; import java.util.ArrayList; public class MainActivity extends ActionBarActivity { ListView listview; @Override protected void onCreate(Bundle savedInstanceState) { super.onCreate(savedInstanceState); setContentView(R.layout.activity_main); listview = (ListView)this.findViewById(R.id.listview); // Create ListView Data ArrayList<String> list = new ArrayList<String>(); list.add("Korea"); list.add("USA"); list.add("Germany"); // Custom Adapter Instance CustomAdapter adapter = new CustomAdapter(this, list); // Set a custom adapter on the ListView listview.setAdapter(adapter); // Add a Item Click Event on the ListView listview.setOnItemClickListener(new AdapterView.OnItemClickListener() { @Override public void onItemClick(AdapterView<?> parent, View view, int position, long id) { CustomAdapter adapter = (CustomAdapter)listview.getAdapter(); Toast.makeText(MainActivity.this, adapter.getItem(position).toString(), Toast.LENGTH_LONG).show(); } }); } // Custom Adapter Inner Class public class CustomAdapter extends BaseAdapter{ Context context; ArrayList<String> items; LayoutInflater inflater; public CustomAdapter(Context context, ArrayList<String> items){ this.context = context; this.items = items; inflater = LayoutInflater.from(context); } @Override public int getCount() { return items.size(); } @Override public Object getItem(int position) { return items.get(position); } @Override public long getItemId(int position) { return position; } @Override public View getView(int position, View convertView, ViewGroup parent) { View v = convertView; if(v == null){ v = inflater.inflate(R.layout.list_item, null); } ImageView imageView = (ImageView)v.findViewById(R.id.imageView); TextView textView = (TextView)v.findViewById(R.id.textView); String nation = items.get(position); textView.setText(nation); // Set a image of ImageView if("Korea".equals(nation)){ imageView.setImageResource(R.drawable.south_korea); }else if("USA".equals(nation)){ imageView.setImageResource(R.drawable.usa); }else if("Germany".equals(nation)){ imageView.setImageResource(R.drawable.germany); } return v; } } } |
※ Refer below video.


